
The complete guide
Downspout Splash Blocks, How To Pick One And Where To Put It
The puddle that keeps coming back
Most people notice the problem before they notice the cause. There is a dip in the garden bed that never dries out, or a strip of render at the bottom of the wall that stays darker than the rest. Sometimes it is a trench cut through the mulch, running away from the corner of the house like a small riverbed.
That is a downspout doing exactly what it was built to do, and nobody giving it anywhere sensible to put the water.
A gutter collects rain from a large area of roof and sends all of it down one narrow pipe. When that water hits the ground it hits hard and it hits one spot. Bare soil loses first. Then the hole deepens, water starts collecting instead of running off, and the ground right beside your foundation stays wet for days after the rain stops.
A splash block is the small, cheap, boring fix for this, and it works better than its price suggests.
What a splash block actually does
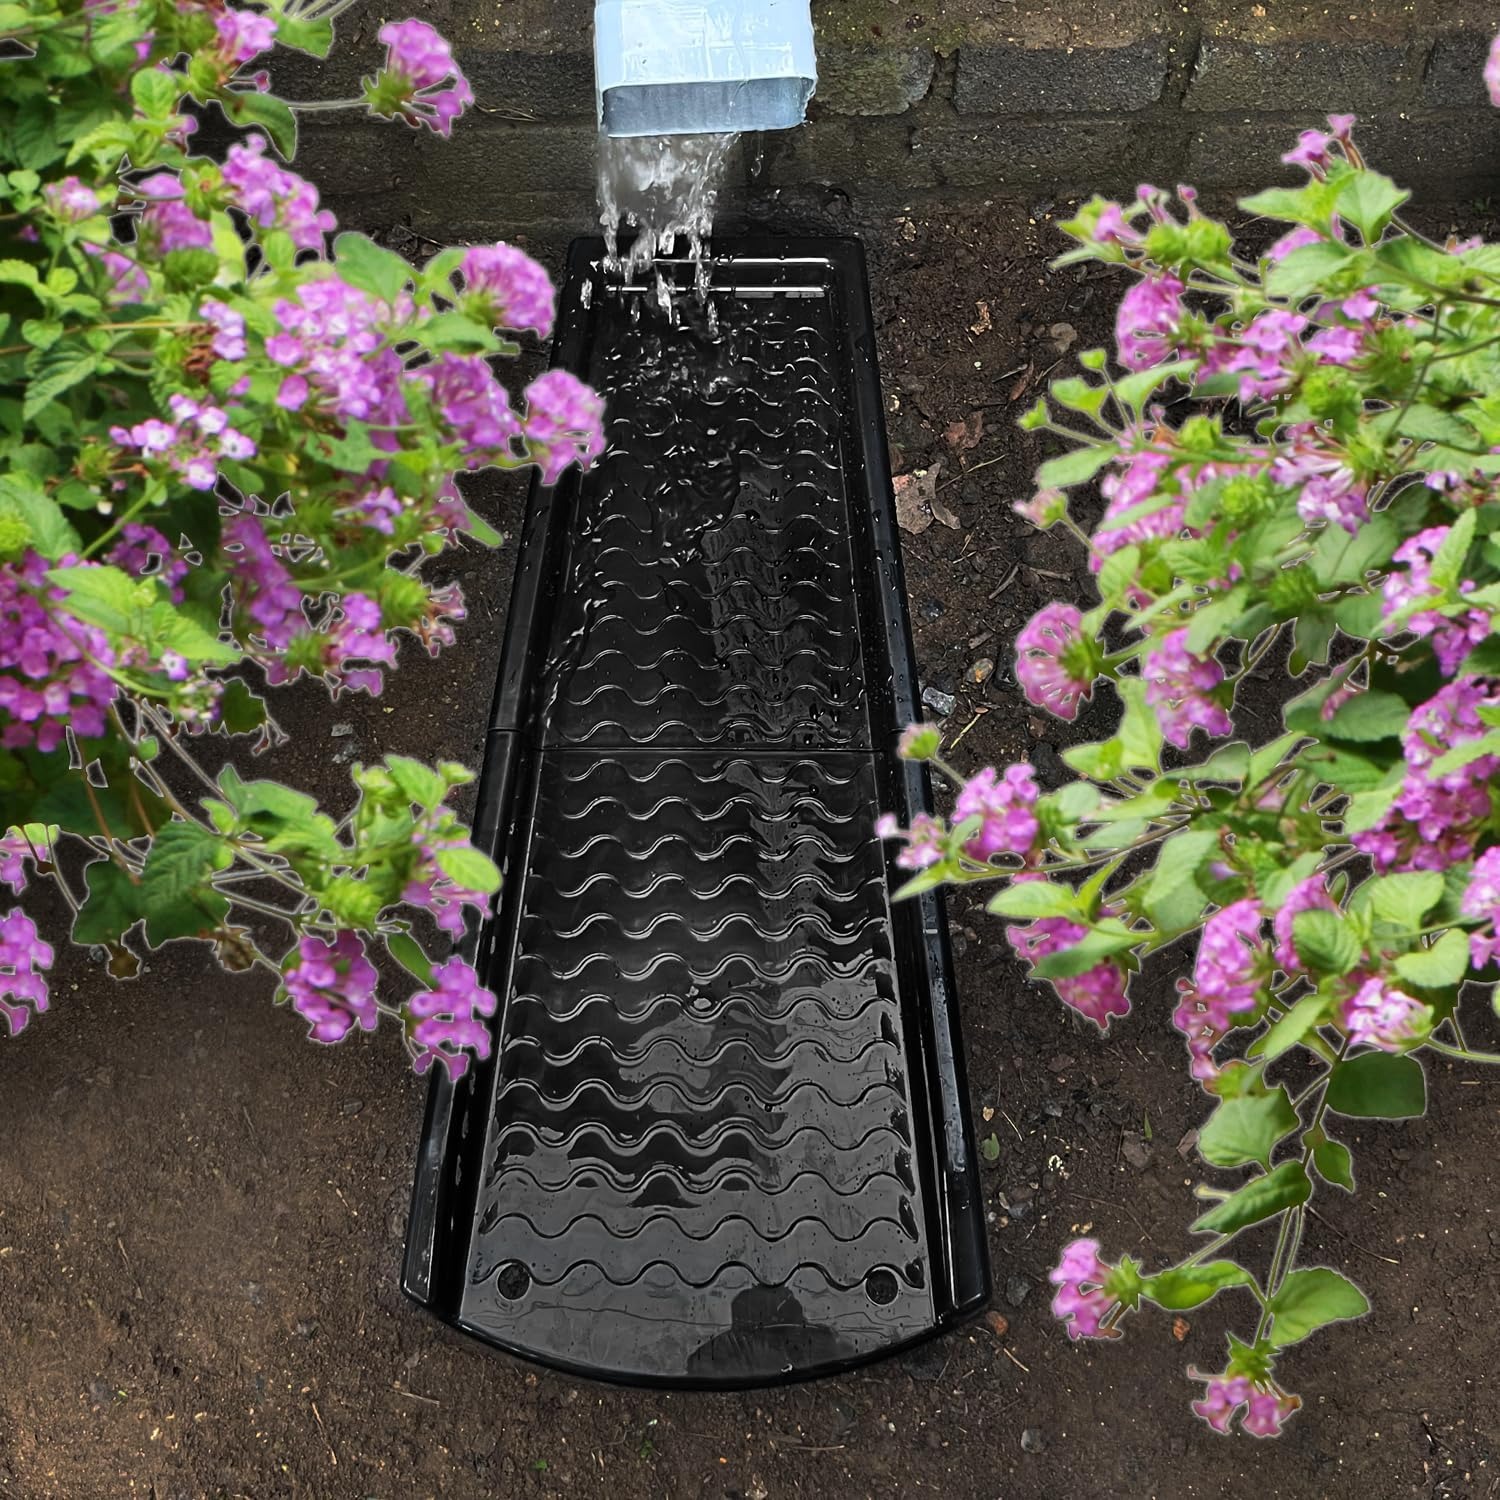
It is a sloped tray that sits under the downspout. Water lands in the back of it, runs along the channel, and leaves at the far lip, spread out and slowed down. Two useful things happen at once. The force of the falling water is absorbed by the tray rather than the soil, and the discharge point moves away from the wall.
That second part is what matters for the house. Soil next to a foundation is meant to shed water, not store it. When it stays saturated, you get the quiet problems: damp at the base of walls, soft ground that settles unevenly, and in cold climates, water that freezes and expands where you really do not want it.
The design details on this one are worth understanding because they are the difference between a tray that works and one that annoys you.
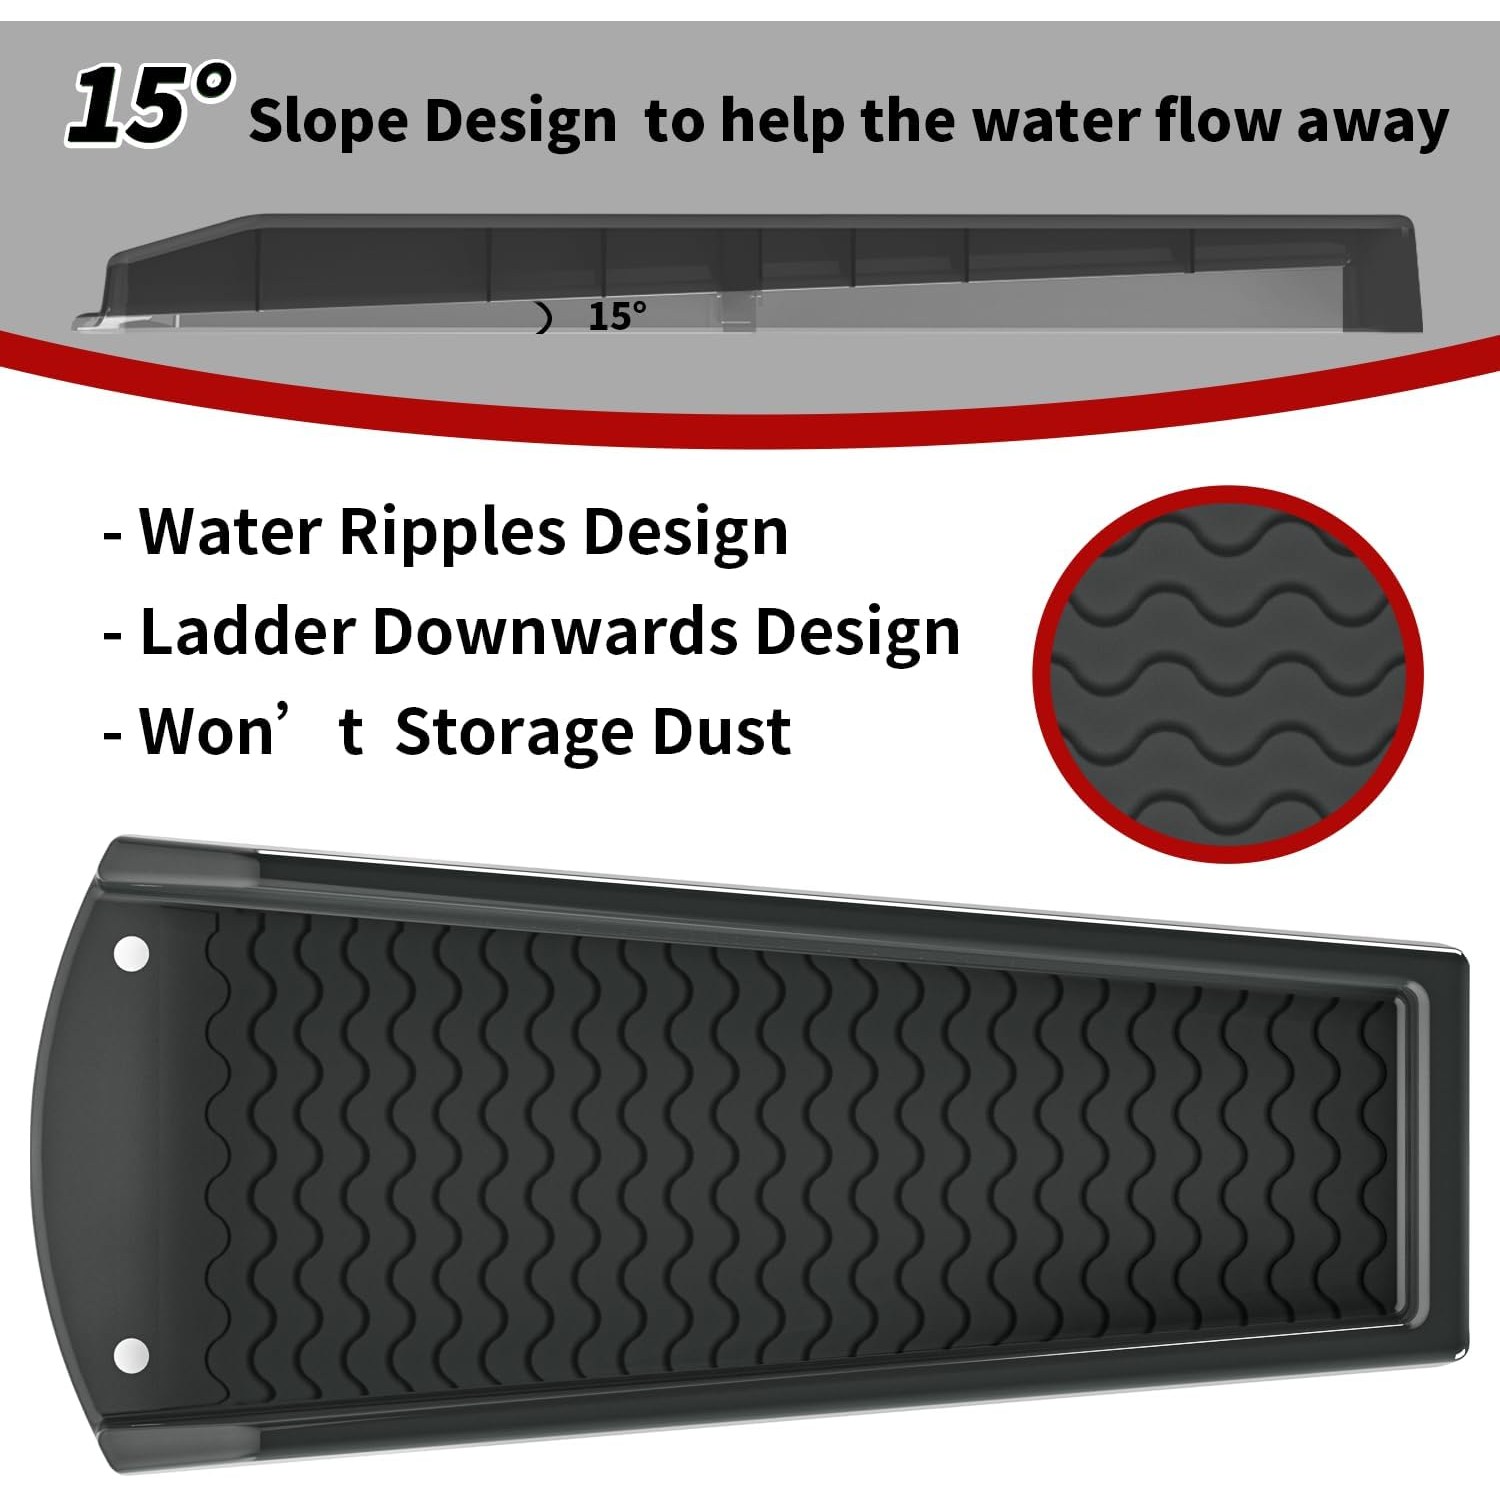
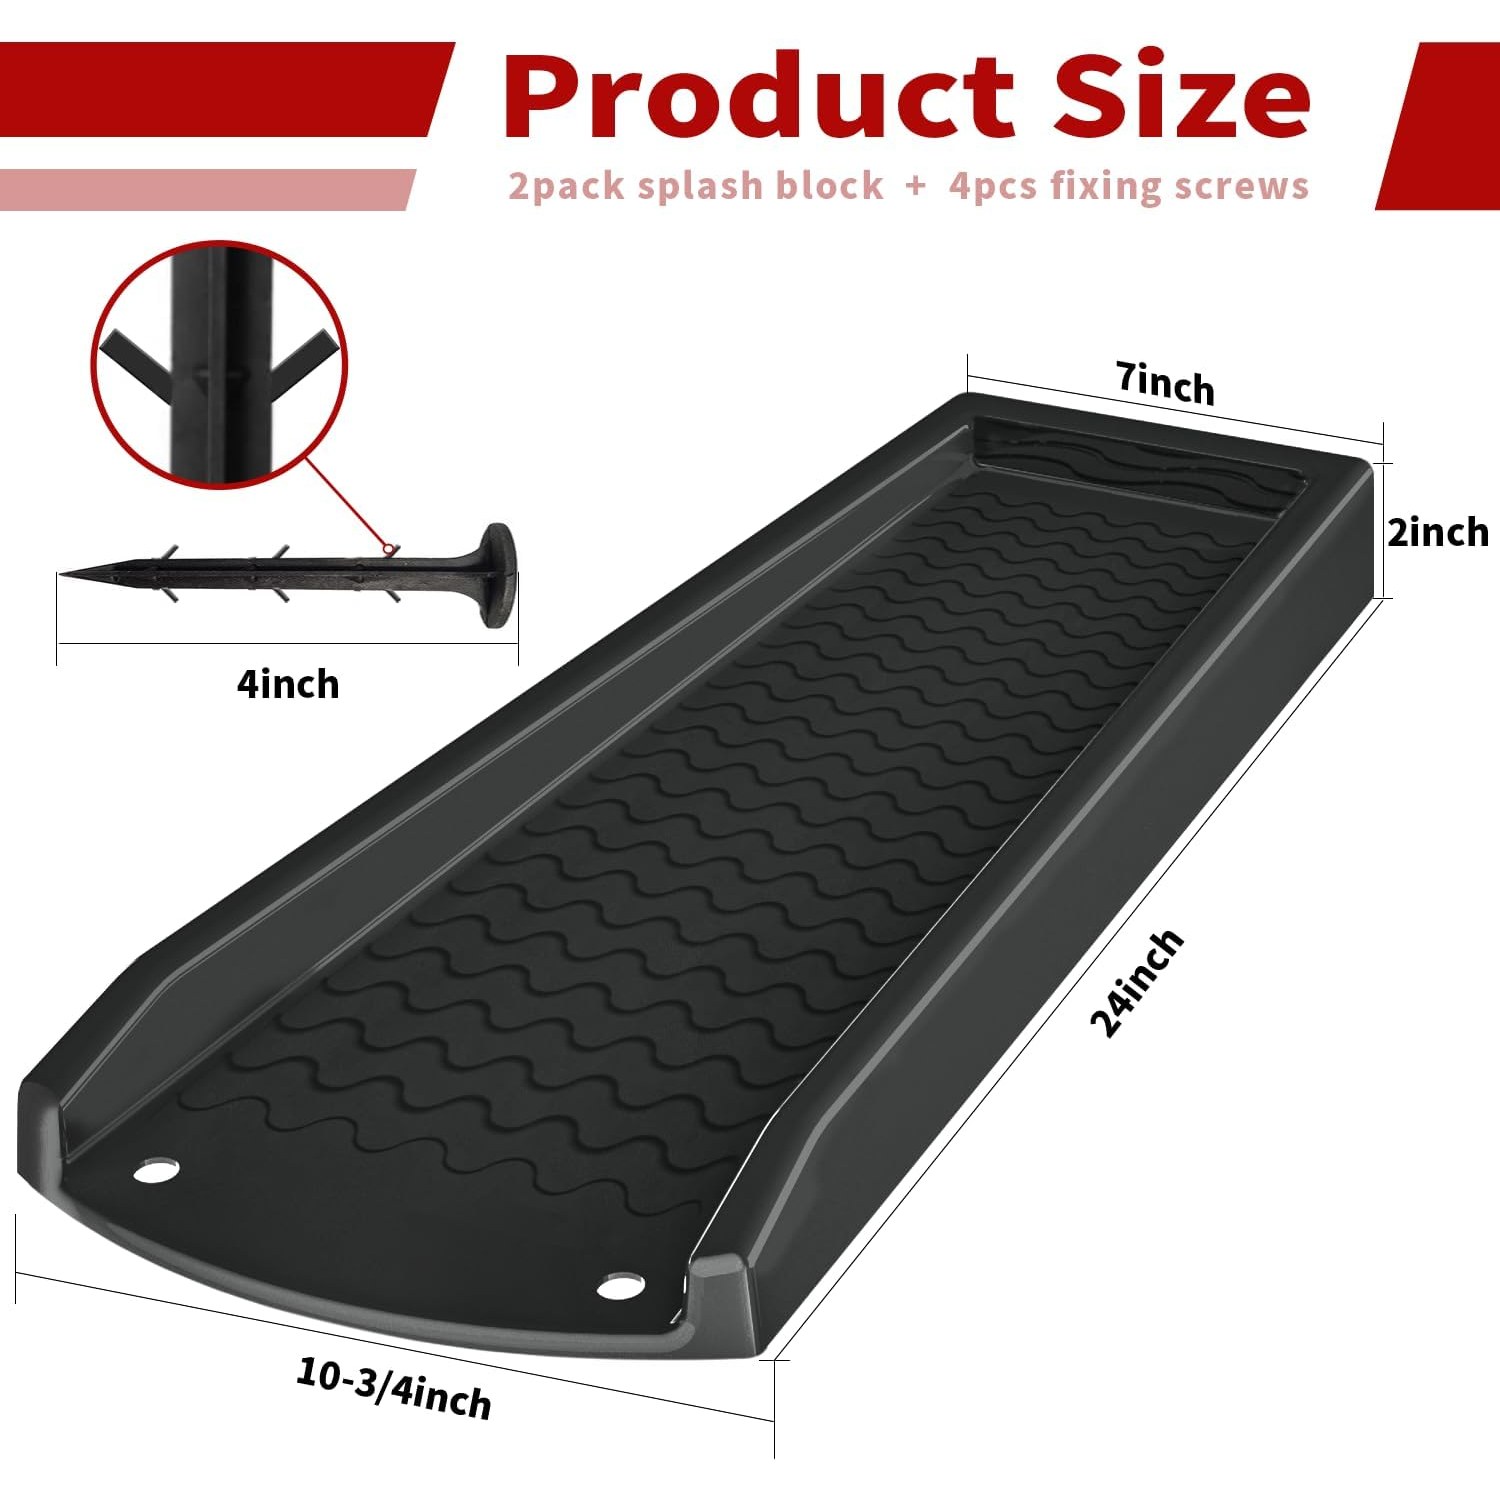
The channel is stepped, falling in stages from the inlet to the open end at roughly a fifteen degree pitch. That keeps water moving and stops it settling in a flat pan where grit builds up. The surface has a ripple pattern running down it, which looks like moving water and also breaks the flow slightly so the discharge leaves as a spread rather than a jet.
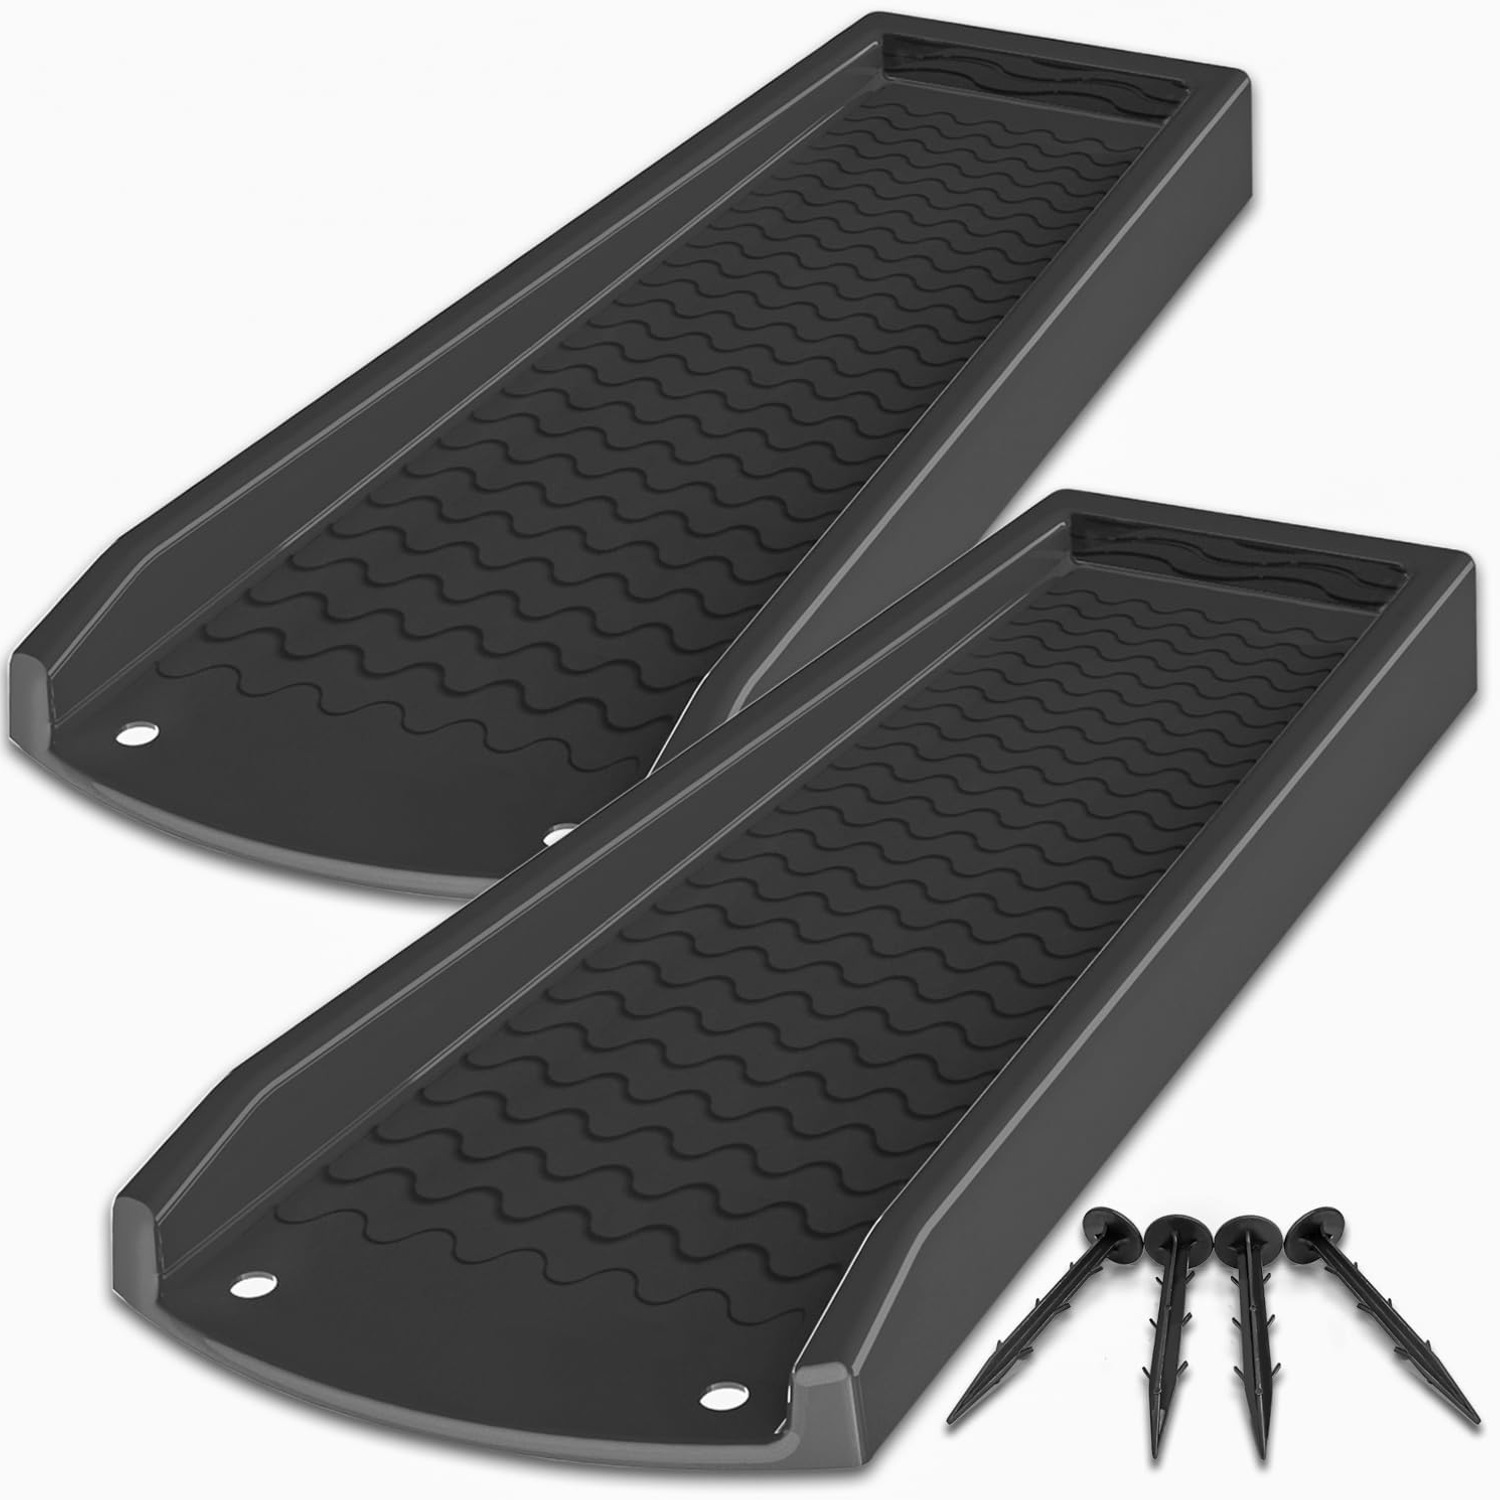
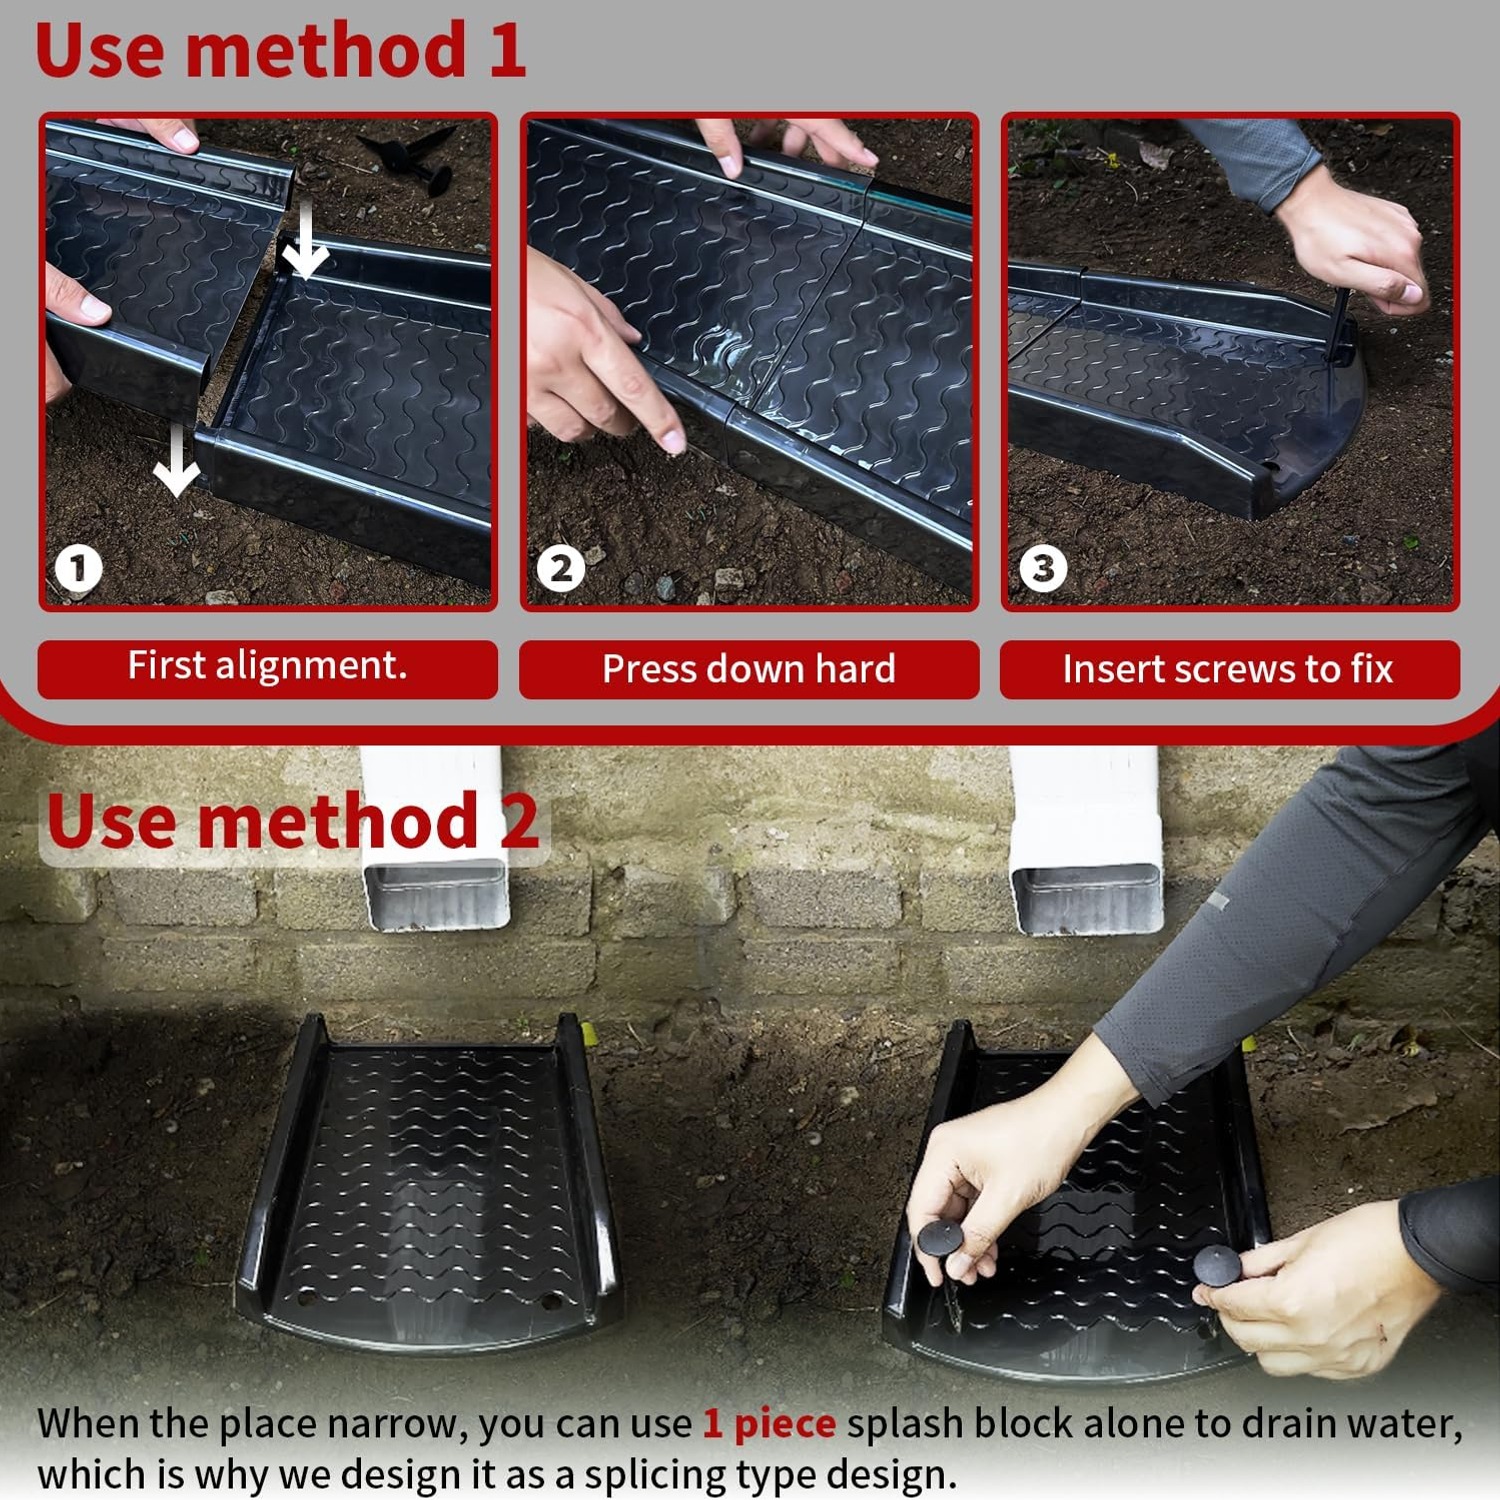
The two pieces splice together. You can run one block alone, or join both for a longer channel. That is more useful than a fixed-length block, because the right distance depends on your ground, not on a product spec.
Who needs one
If your downspout currently empties onto bare soil, mulch or a garden bed, you need something. That is the clearest case. Soil has no resistance to a concentrated stream of water and it will excavate itself.
If the pipe empties onto a concrete path that slopes away from the house, you are in reasonable shape already, though a block still stops the splash marks up the wall and the slippery green film that grows on wet concrete.
Sheds and garages are the forgotten ones. Small roofs still shed a lot of water, and outbuildings usually sit on a thin slab or timber bearers with no perimeter drainage at all. A single block under a shed downspout is one of the better twenty minute jobs you can do.
The case where a splash block alone will not be enough is ground that slopes back toward the house. In that situation water leaving the tray simply runs home again. You can help by joining both pieces and aiming along the contour instead of straight downhill, but the real answer there is regrading or a buried drain line. Be honest with yourself about which situation you are in.
Choosing between materials and colors
Most splash blocks on the market are molded plastic, with concrete and cast metal versions available at higher weight and higher price. Plastic wins on handling and on not cracking, as long as it is the right plastic.
This one is specified as PP rather than the PE that shows up in the cheapest trays. The practical difference is in how it ages outdoors. PE blocks tend to go chalky, then brittle, then crack along a stress line after a couple of summers. The manufacturer rates this PP as UV-proof and states it will not fade, deform or crack in weather, with a load rating of 500 pounds. That load figure is more relevant than it sounds, since the block will get stepped on, mowed around and occasionally driven over by a wheelbarrow.
Color is a genuine decision, not just a preference. Black blends into bare soil, mulch and dark garden beds, which is where most downspouts discharge. On a bright lawn, black reads as a dark rectangle and you will see it from the kitchen window. If the block is going into the middle of turf, a grass green version is the quieter choice. The maker makes that point directly, and it is good advice.
Fitting it so it stays put
Here is the failure most people run into. They set a light plastic tray under a downspout, it looks right, and then after the first real storm it has slid half a meter and is pointing at the wall.
Water coming out of a downspout in heavy rain has real force, and wet soil offers almost no grip. The fix is simple and it is included in this pack. Each block has two pre-made holes. The pack includes four PP fixing screws. You position the tray, then drive the screws through the holes into the ground.
A few things to get right while you are down there.
Check the fall by eye before you fix anything. The lip should clearly sit lower than the inlet. If the ground under the back of the tray is soft, pack a little compacted soil or a flat paver under it so it does not sink and reverse the slope over time.
Make sure the downspout actually empties inside the back section, not over the edge of it. If the pipe ends high and the water arcs out, fit a short elbow to aim it down into the tray.
Leave a small gap between the back of the tray and the wall if you can. It lets you sweep behind it and stops soil packing up against the render.
Keeping it working
Maintenance is light but it is not zero. Grit, leaf fragments and roof sediment all come down the pipe and some of it lands in the tray. The stepped slope flushes most of it through, but once or twice a year a hose rinse and a sweep underneath keeps the channel clear and stops soil banking against the sides.
After a very heavy storm, glance at it. If water is standing in the tray rather than draining, either the block has been knocked out of level or there is silt sitting in the low step. Both are two minute fixes.
In winter, clear snow off by hand or with a plastic shovel. Chipping ice off any outdoor plastic with a metal blade is how you put a crack in something that would otherwise have lasted years.
If you are using the fixing screws, check them after the first few big rains. Soft ground settles, and a screw that was snug in fall might be loose by spring.
Thinking a bit bigger
A splash block solves a local problem well. If you have a lot of roof feeding one pipe, or clay soil that drains slowly, you may want to treat the block as the first step rather than the whole plan.
Flexible downspout extensions clip onto the pipe and carry water several meters before releasing it. They pair well with a splash block, which then acts as the landing pad at the far end. Buried drain lines are the permanent version of the same idea. A rain barrel takes the water out of the equation entirely for part of the year, though you still need a block for the overflow.
Counting matters too. A typical house has four or more downspouts, and the ones at the back corners are usually the neglected ones. Two blocks cover one awkward corner properly or two separate pipes with a single block each.
The short version
Water leaving a downspout needs somewhere to go, and bare soil is not it. A sloped tray takes the force of the fall, spreads the flow and moves the discharge point away from your foundation.
This pack gives you two PP blocks that work alone or splice together, four fixing screws so they stay where you put them, and a stepped channel that keeps itself reasonably clear. Black suits soil and beds. Green suits lawn.
Fix them down, check the fall runs away from the house, and rinse them out a couple of times a year. That is the whole job, and the muddy patch under the gutter stops coming back.