
The complete guide
How to Choose a Washer Drain Hose Extension That Will Not Leak
The problem nobody plans for
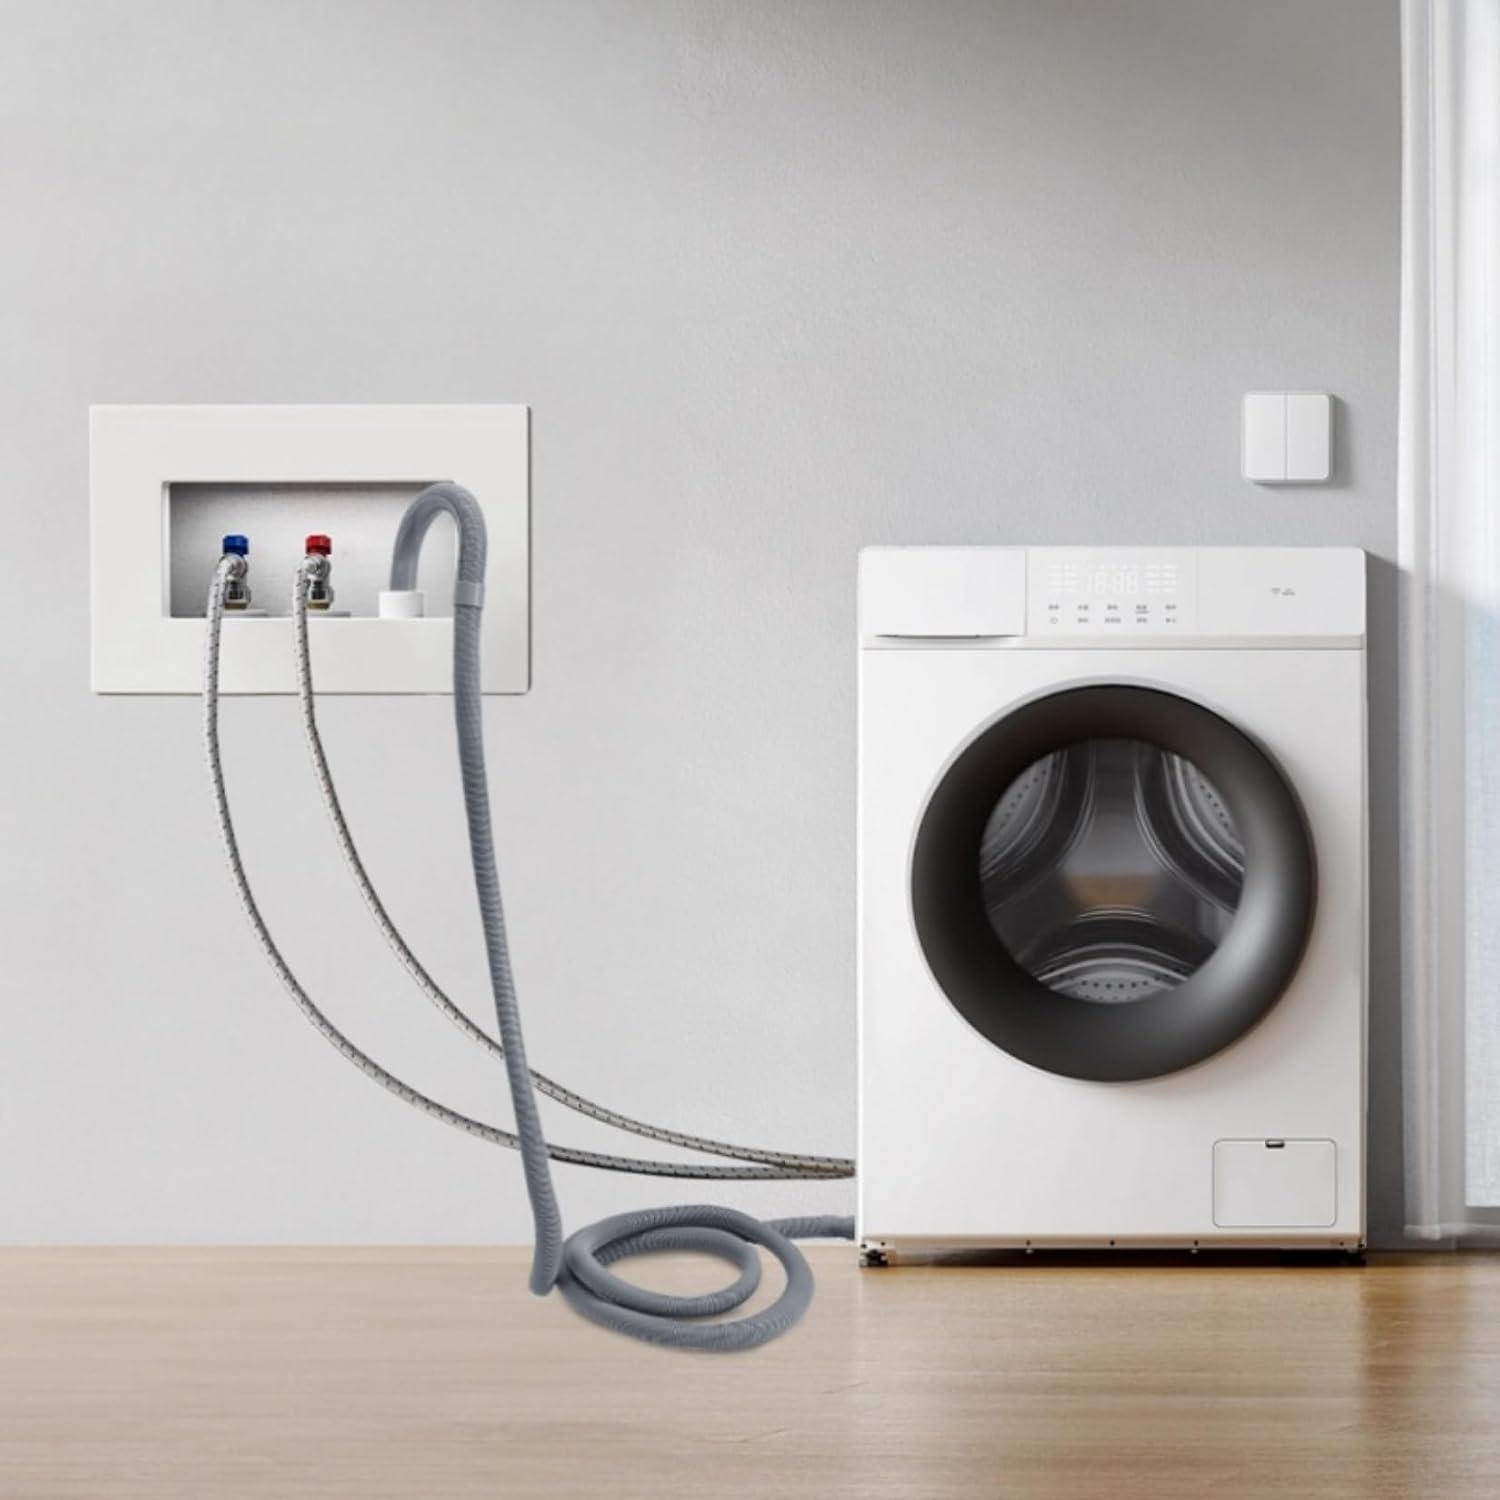
Laundry plumbing is almost always an afterthought. A standpipe goes in where the builder had room for it, the machine goes in where it fits, and the factory drain hose has to bridge whatever distance is left. Sometimes that works out. Often it does not, and you end up with a hose pulled bar tight across the back of the machine, or a machine shoved so hard against the wall that the hose is folded over on itself.
Both of those are failures waiting to happen. Tension at the pump outlet works the joint loose over hundreds of cycles. A hard fold restricts the bore and the machine starts complaining it cannot drain. Neither problem announces itself. You find out when there is water across the floor, usually on a weekend.
A six foot extension is the cheap fix. It buys you slack, it lets you route the hose the way you want, and it costs a fraction of a service call.
How a drain hose extension works
Your washing machine does not rely on gravity to empty. It has a pump that pushes water out, which is why the hose can run uphill to a standpipe mounted a meter off the floor. That pump has a limit, and every appliance manual lists a maximum discharge height. Stay under it and drainage is quick. Go over it and the pump works harder, cycles take longer, and you may get an error code.
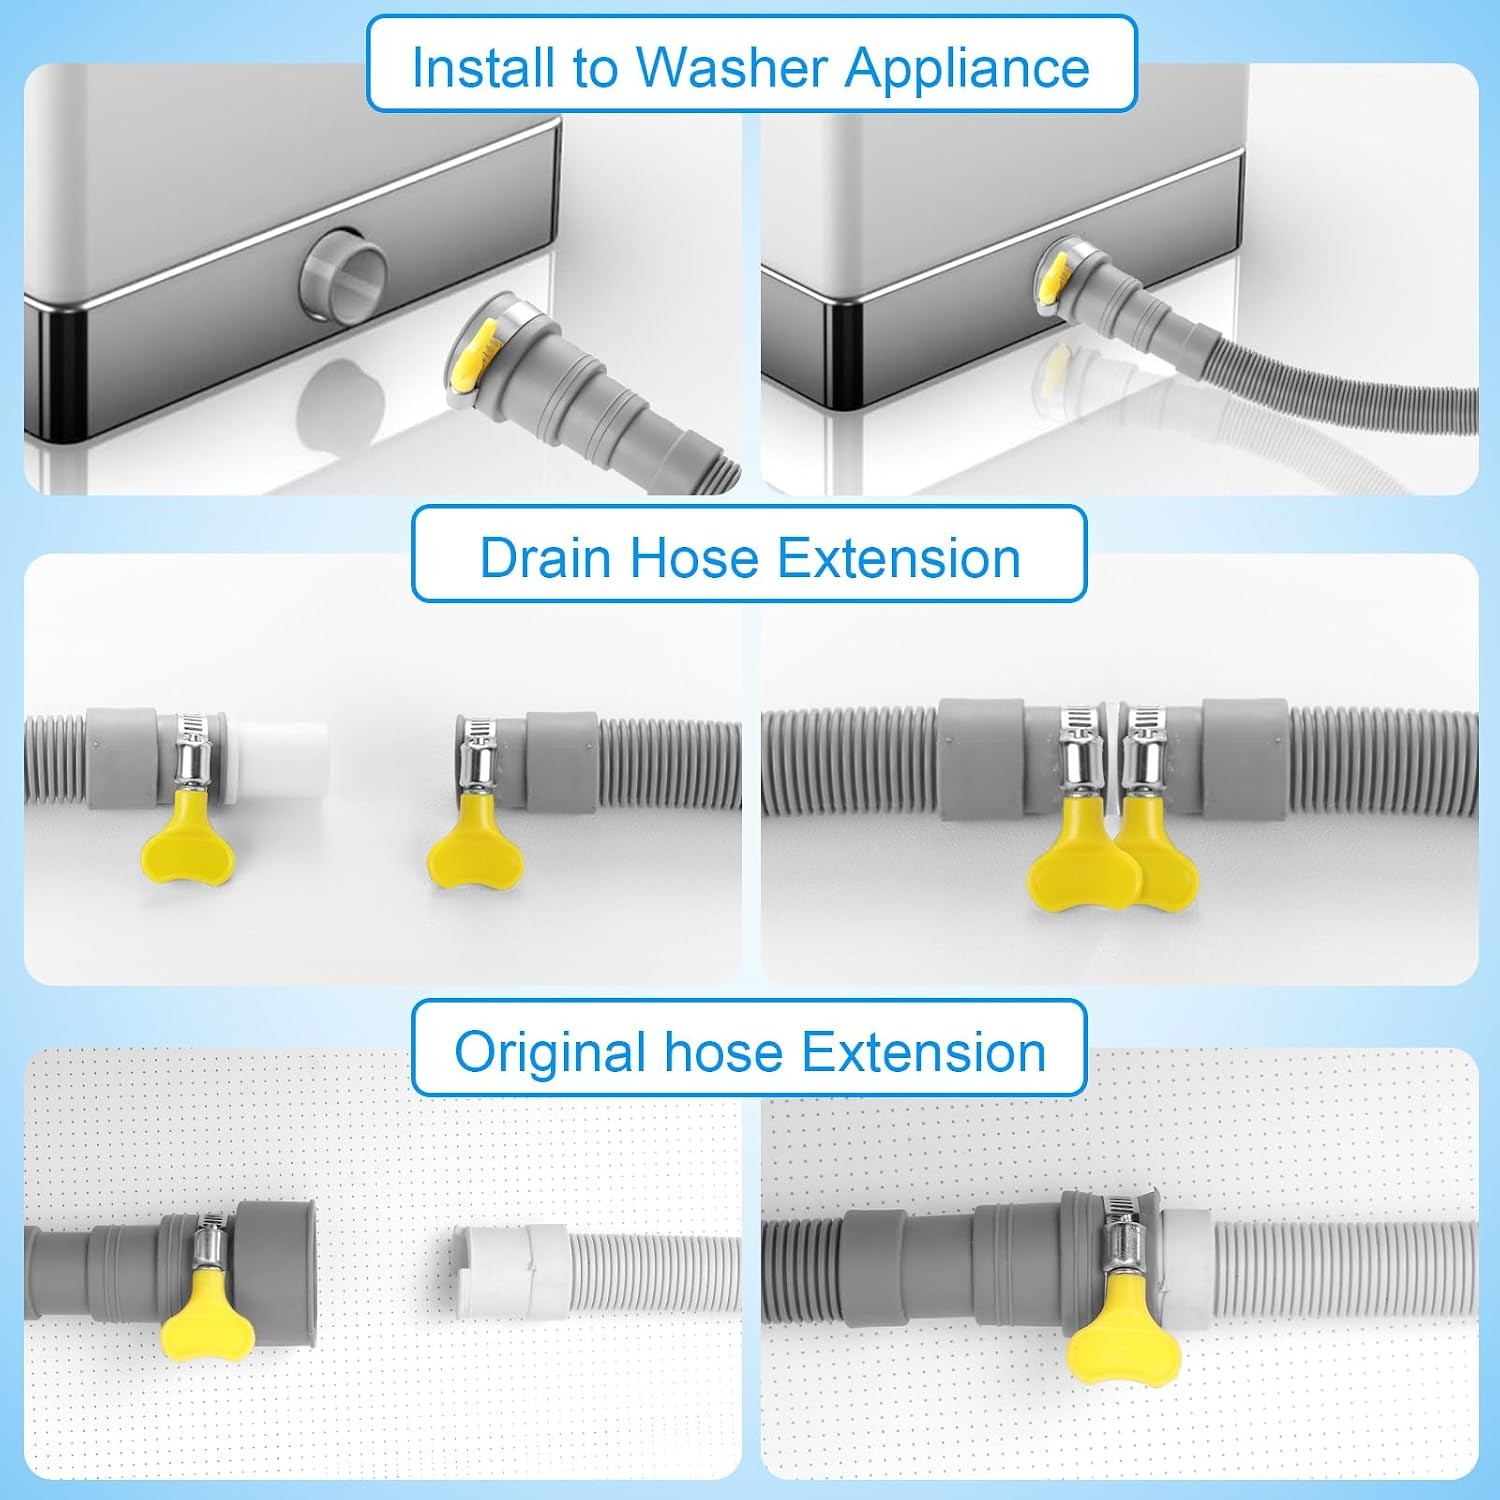
The extension hose is simply a longer path for that water. It slides over the existing hose end or over the supplied adapter, and a clamp squeezes the joint tight so pressure cannot push the connection apart. The far end sits in the standpipe, over a laundry tub rim, or at a floor drain.
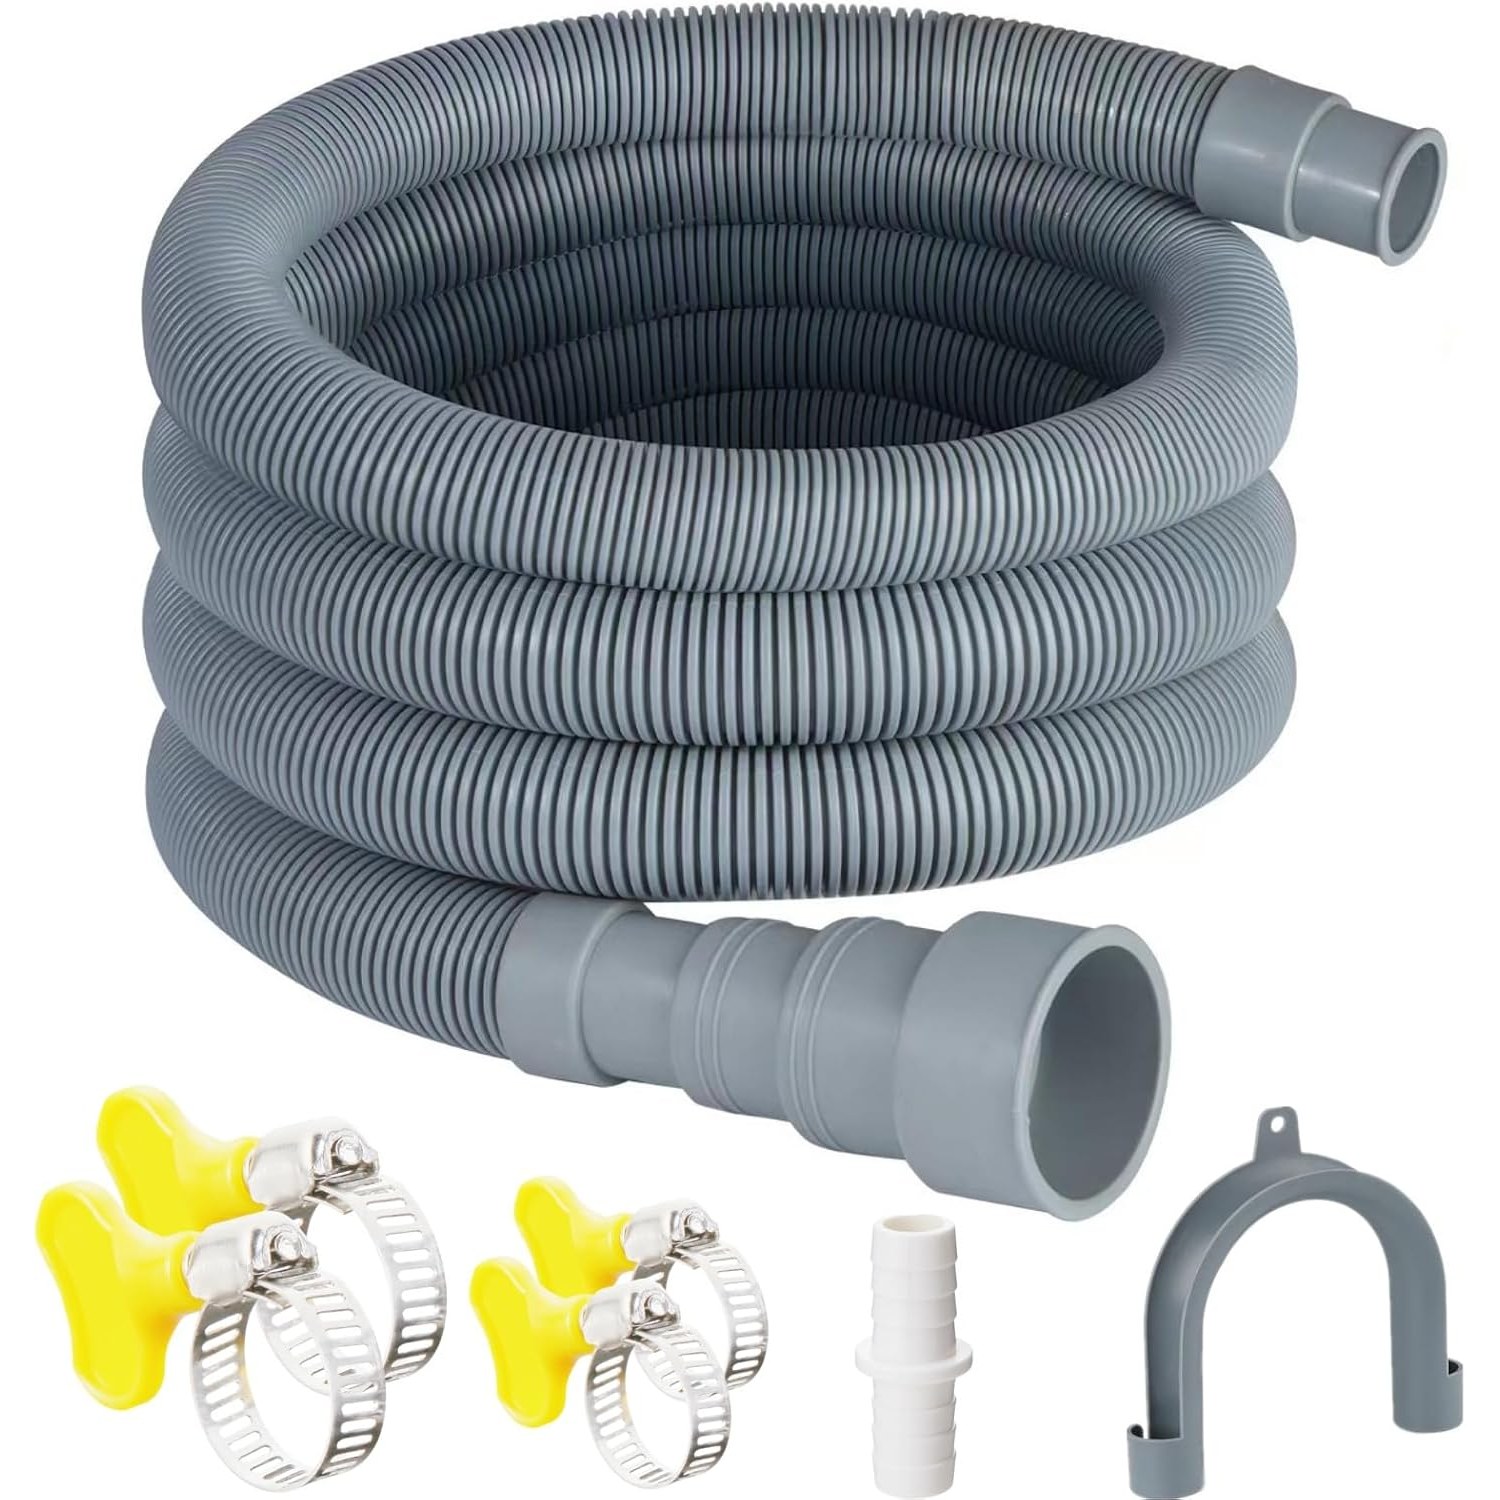
Two things make a drain hose extension good rather than adequate. The first is a wall that holds its shape through a bend. This hose uses a corrugated polypropylene profile with a 1.5 mm nominal wall and a 22 mm outside diameter. The ribs act like the rings in a vacuum cleaner hose, keeping the bore open when the hose curves. The second is proper clamping at every joint, which is why four clamps come in the box instead of none.
Why the U-bend holder matters more than it looks
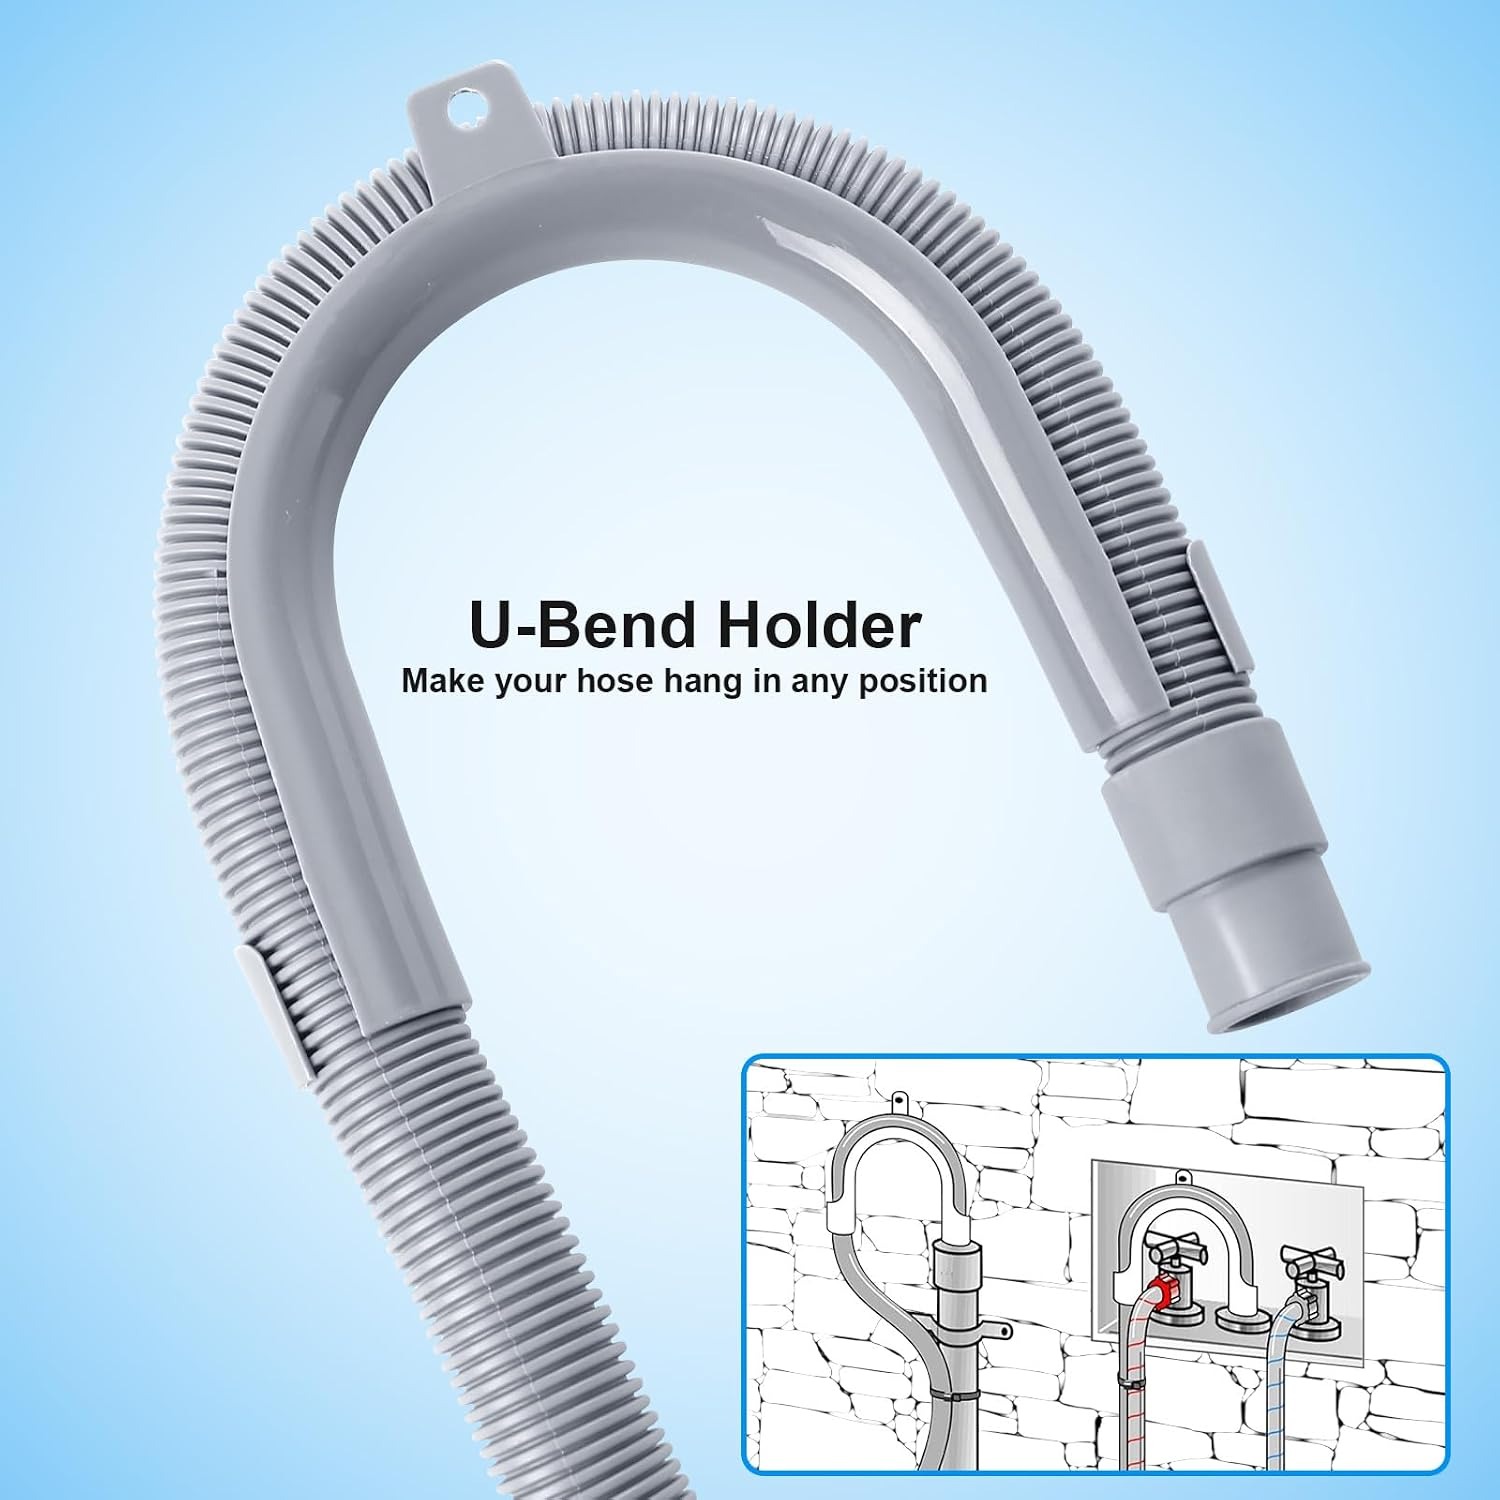
The small plastic hook in this kit does a job that catches people out. Water in a drain line wants to find its own level. If the end of your hose sits deep inside the standpipe, below the water in the trap, the machine can siphon. That means water drains out of the drum as fast as it fills, so the machine never completes a wash, or it keeps refilling and you get a cycle that will not end.
The U-bend holder sets the last curve of the hose at a fixed height and holds the end at the right depth. It also keeps the hose from kicking out of the pipe when the pump surges at the start of a drain. Clip it on, set the position once, and that part of the install is done.
If you are hanging the hose over a laundry tub instead, the same hook stops the end from sliding down into the water. That is the single most common cause of dirty water getting sucked back into a machine.
Who this kit suits
Renters get the most out of it, because rental laundries are where appliance placement is least flexible and where you cannot change the plumbing. A flexible extension means you work around the standpipe you were given.
It also suits anyone with a portable or apartment-sized machine that drains to a sink, since those almost never come with enough hose to reach comfortably. The same goes for people who have just moved a machine to a different wall, added a second appliance to an existing drain, or built a laundry into a garage or a cabinet.
Dishwashers are covered too. The kit is sold for both appliance types, though dishwasher installs usually need a high loop or an air gap depending on local rules, so check your manual and your building code for that detail.
Choosing the right length and diameter
Measure before you buy. Run a tape from the appliance outlet, along the path the hose will actually take, to the drain point. Add a little slack so the machine can be pulled out for cleaning without dragging the hose tight. If that total is longer than your current hose, you need an extension, and six feet covers most domestic gaps with room spare.
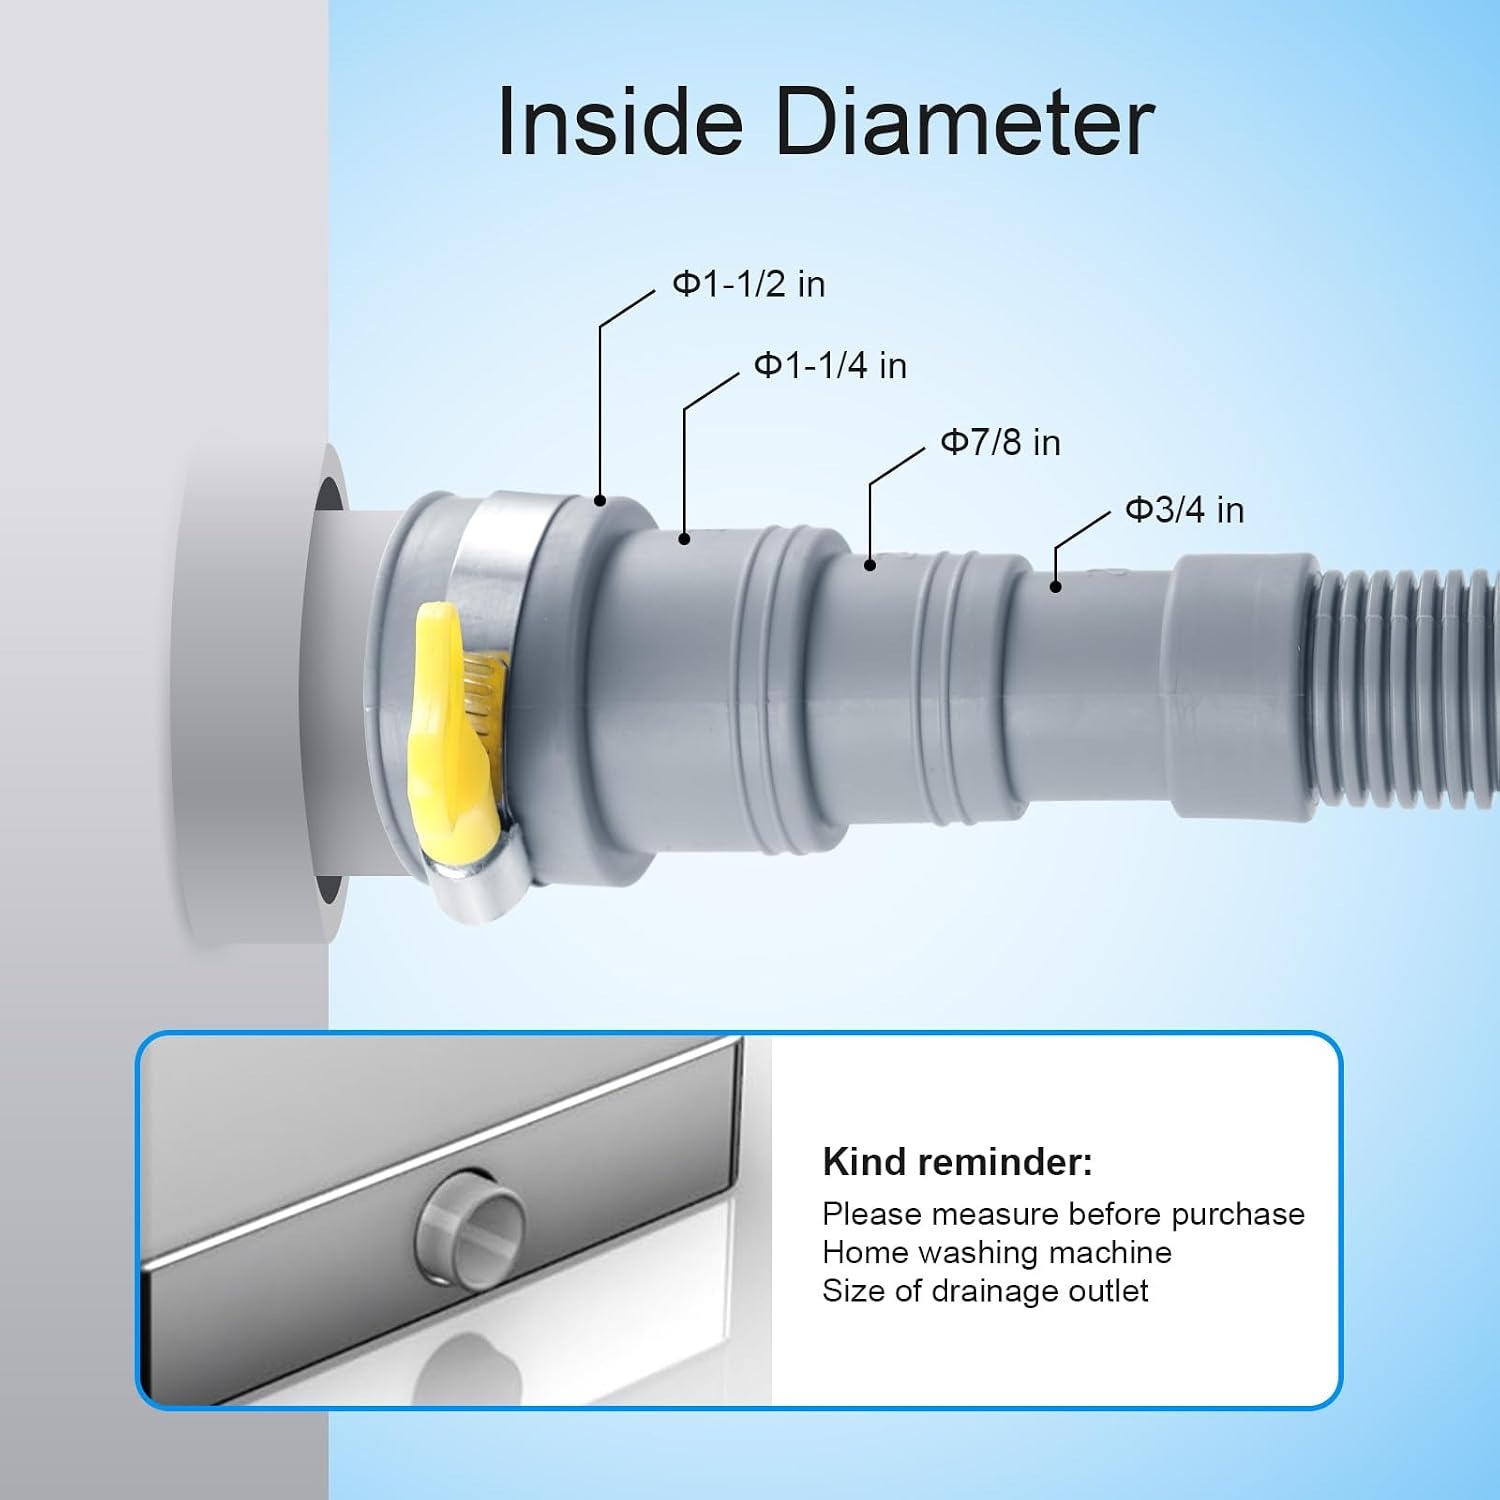
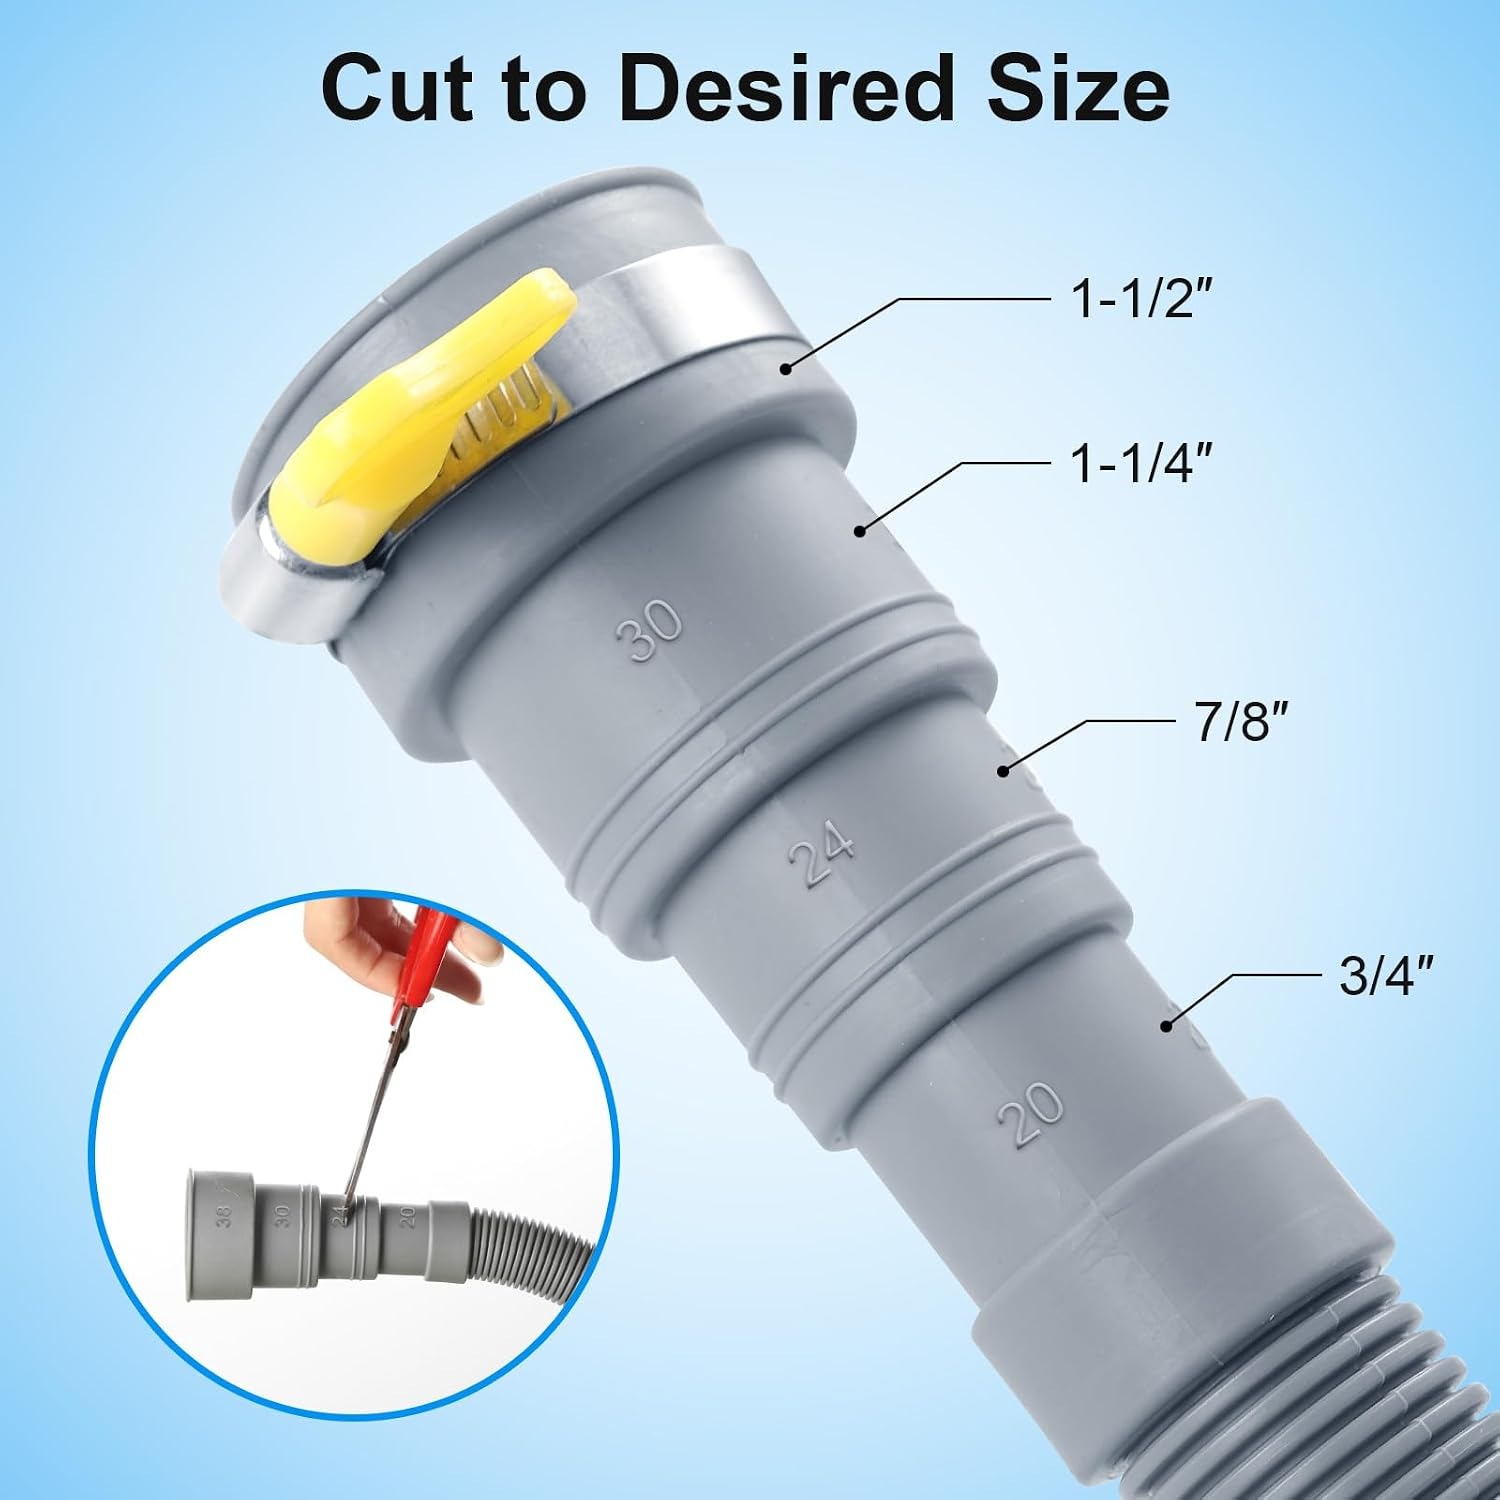
Diameter is the other number. The hose here has a 22 mm outside diameter, and the included adapter steps between common appliance outlet sizes. Check your existing hose end with a ruler or a caliper. If the sizes are close, the barbed adapter and a clamp will do the job. If your outlet is wildly different, you need a different part, and it is better to find that out before you have the machine pulled out.
Resist the urge to buy far more length than you need and coil the spare behind the machine. Excess hose creates sags, and sags hold water between cycles. Trim the hose to suit, cutting square in the valley between ribs.
Fitting it without drama
Turn the machine off at the wall and pull it out far enough to work behind. Empty any water sitting in the old hose into a bucket or a towel, because there will be some.
Slide the extension onto the existing hose end or onto the adapter. Push it fully home so the barbs are covered. Slip a clamp over the joint, position it over the barbed section rather than past the end of it, and tighten evenly. Do the same at any second joint.
Route the hose with gentle curves. Keep it off the floor where feet and vacuum cleaners can catch it, and away from hot surfaces. Clip the U-hook at the drain end and set the height.
Then test it. Run a rinse and spin on the machine, stand there for the drain phase, and look at every joint. A dry paper towel under each connection will show a weep that your eyes would miss. If everything is dry, push the machine back carefully so the hose is not crushed against the wall, and you are finished.
Keeping it working
A drain hose is low maintenance but not no maintenance. Check the clamps twice a year and nip them up if they have loosened, since plastic relaxes slightly over time. Look at the hose for stiffness, cracks or a white stress line at a tight bend. Any of those mean it is near the end of its life.
If the machine ever drains slowly, check the hose before you blame the pump. A sag holding water, a kink behind the machine, or an end pushed too far into the pipe will all slow things down and cost nothing to fix.
Flush the hose with clean water if the machine has been unused for a long stretch. Wipe the outside with a damp cloth when you clean behind the machine.
The short version
A six foot corrugated extension with four clamps and a U-bend holder solves the most common laundry plumbing problem for the price of a takeaway meal. The ribbed polypropylene bends without kinking, the clamps keep the joints sealed under pump pressure, and the hook sets the discharge end at a height that drains properly without siphoning.
Measure your distance, check your outlet diameter, clamp both ends, and test with a short cycle before you push the machine back. Done properly, this is a ten minute job that stops a flood you would otherwise be mopping up in a year or two.